Custom Domain Names
Make your yacht blog stand out with your own domain name.

Domain mapping is available for free to Admiral members! Sign up or upgrade your membership today!
How to map your custom domain name to your Yacht Blog.
At YachtBlogs.com, it’s easy to use a custom domain name, like myblog.com, instead of your blog’s current address, like myblog.yachtblogs.com. Your old blog address will still work, but we will automatically redirect traffic from your old address to your new one. You won’t lose any readers after mapping your domain name.
What You’ll Need
You’ll need to register your own domain name before connecting it to your Yacht Blog. Yacht Blogs does not handle and our premium blogs do not include domain registration.
The process of connecting your custom domain name to your myblog.yachtblogs.com blog is called domain mapping. The remainder of this post will explain how to map your custom domain to your Yacht Blog.
You can map domains with any extension to your blog (.com, .net, .org, .co.uk, etc).
Update your domain’s name servers to the following:
ns1.yachtblogs.com
ns2.yachtblogs.com
Most often, you can change your domain’s name servers at your registrar’s website. The process is different for each domain registrar.Wordpress has good instructions for popular registrars are available here. If your registrar isn’t listed, visit their website or contact their support team for assistance. When a new domain is purchased or when name servers are updated, it can take some time for the change to take full effect (up to 72 hours).
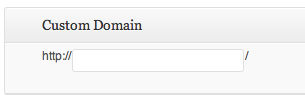
Finally, go to Tools -> Domain Mapping in your blog’s dashboard, enter your custom domain name (without www.) into the custom domain field and click Add. That’s it – you’re finished!. Please note that this page will ask you to create an “A Record” pointing to our IP address. This step is not required. Only add an “A Record” if you know what you are doing. An “A Record” is not required for your custom domain to work with Yacht Blogs.

Still having trouble? Contact us and let us know what’s going on.
Ready to begin? Start blogging with us today!